5.2 Creating the connections
Warning: If you have Active Directory installed in your environment but want to use a different directory service, you must change the association that was automatically created during installation to exchange data with the other directory service.
You can connect to multiple directories simultaneously and have multiple connection points within a single directory.
Note: All of the LDAP directories referenced by MyID must be provided by the same vendor and must use the same LDAP schema for any data linked to MyID records.
You configure LDAP connections within MyID.
-
From the Configuration category, select Directory Management.
You can also launch this workflow from the Connections and Notifications section of the More category in the MyID Operator Client. See the Using Connections and Notifications workflows section in the MyID Operator Client guide for details.
-
If there is a directory in the Select Directory box, information about it is displayed.
You can:
- Add a directory by clicking New.
- Edit an existing directory by selecting it in the Select Directory drop-down list and clicking Modify.
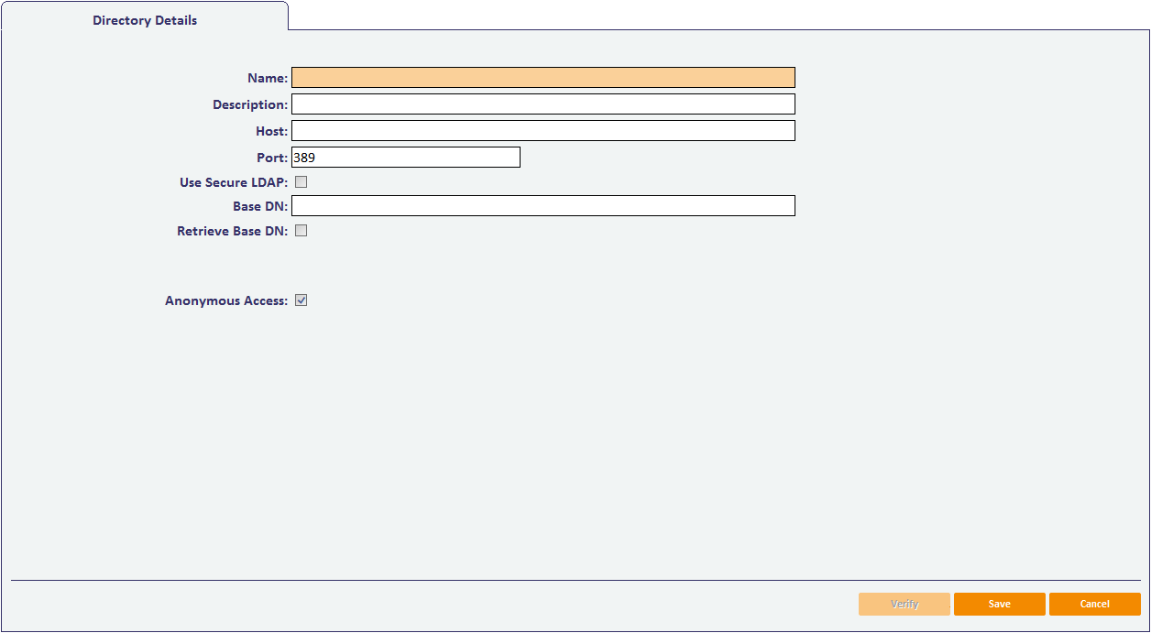
You are now in the Edit Directory stage.
Note: If you are modifying the details of a directory that was automatically detected, some of the information on this page may already be completed.
- Give the directory a meaningful Name and Description to help you to recognize it.
- Enter the name or IP address of the machine hosting the directory in the Host field. You may need to enter a fully qualified domain name if the machine is in a different domain from the MyID server.
-
Enter the Port that is being used for LDAP connections.
The default port for standard LDAP connections is 389 and the default port for secure LDAP connections is 636.
Note: You must enter the port that the directory is using – check with your directory administrator.
- If the directory you are connecting to is using secure LDAP, select the Use secure LDAP option.
-
Enter the Base DN for the directory. Either:
- Type the information directly into the field.
- Select the Retrieve Base DN option.
MyID attempts to connect to the directory and, if successful, displays a list of possible DNs. Select one of the DNs from the list.
-
By default, MyID connects directories anonymously. For Active Directory, this means that MyID uses the interactive user; for MyID this is the MyID COM+ user account set up at installation. If you want to change this, and specify a user account:
- Clear the Anonymous Access option.
-
Enter the User DN and the Password associated with the account that will be used to connect to the directory.
Note: In some Active Directory setups, connecting anonymously using the interactive user may fail. You can set MyID to connect using a specific account; this can be the same account as that used by the interactive user.
Note: Whether you are using anonymous access or a specific user, you must ensure that the user (which is the MyID COM+ user in the case of anonymous access) has the appropriate permissions to update the directory.
Note: The introduction of User Account Control in Windows Server 2008 and Windows Vista has affected making modifications or additions to an LDAP directory. When a user is logged on to a DC with a restricted UAC Administrator token and using NULL credentials, any modification or addition to the directory, or any schema change operation, will fail with insufficient access rights. This includes DirSync searches, retrieving the SACL from an object's ntSecurityDescriptor attribute when using SecurityDescriptorFlags, and many other operations. If User Account Control is in effect when an administrator logs on to a DC, the administrator will get a restricted token in the logon session. If he or she then uses ldap_bind_s with NULL credentials, then operations that make modifications or additions will fail.
-
Click one of:
- Verify – MyID attempts to connect to the directory using the information you have provided.
- Save – to save the details you have entered.
- Cancel – to leave the workflow without saving any information.